Attributes and styles
The controls at the bottom of the graphics editor interface enable you to change the graphic attributes of the currently-selected element.

Positioning and dimensions
By entering a value for x or/and y, objects can be placed even more exactly.
The w (width) and h (height) values let you set any exact dimension for an object.
The lock symbol between w and h lets you lock up the object's ratio.
Colors
This control enables you to choose none ![]() , a solid
, a solid ![]() or a gradient
or a gradient ![]() fill for the current selected element or for its stroke.
fill for the current selected element or for its stroke.
 No fill
The fill or the stroke of the element will be completely transparent.
Hint
If a text has no fill color, it is still displayed in the builder but not in the visualization.
 Solid fill
The fill or the stroke of the element will be filled with a single color.
You can pick a color by clicking on the color palette or you can enter the RGB (red, green, blue) values or the HSV (hue, saturation, value) manually. You can change the opacity of the color by changing the alpha value.
Hint
If you click the pipette icon
 the mouse will change to a cross hair. Move the cursor over any element on your screen and click it once - the currently-selected element will be colored.
 Gradient fill
You can select a linear or a radial gradient.
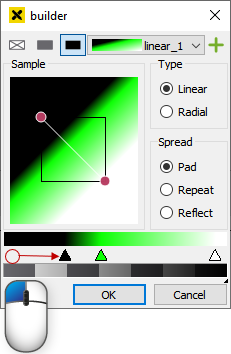
Modifying a linear gradient
The vector of the linear gradient is displayed by a white line in the sample box. You can change this vector by dragging the two red endpoints of the line.

Drag the two red points to change the vector of the linear gradient
Modifying a radial gradient
The center of the radial gradient is displayed by a red point in the sample box. You can change this point by dragging it.
The radius of the radial gradient is displayed by a white circle in the sample box. You can change this circle by dragging it.
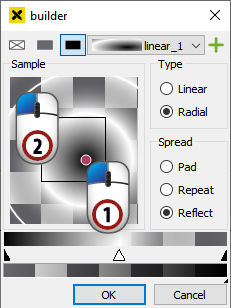
Drag the center point and the surrounding white circle to change the radial gradient.
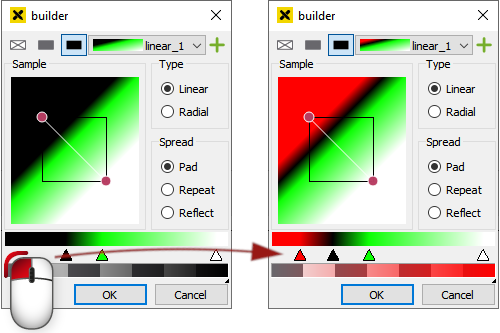
Changing gradient colors
The gradient color bar and the gradient opacity bar are located below the sample box. The small triangles at the bottom of the gradient color bar represent the different colors of the gradient. You can change the colors of these color stops, change their arrangement and add color stops.

Gradient color bar and gradient opacity bar
Changing the color of a color stop
Change the color of a color stop by double-clicking on the corresponding triangle and selecting the new color from the dialog which appears.

Change the color of a color stop by double-clicking on the corresponding triangle
Changing the arrangement of a color stop
Change the arrangement of a color stop by dragging the corresponding triangle.
Move a color stop by dragging the corresponding rectangle
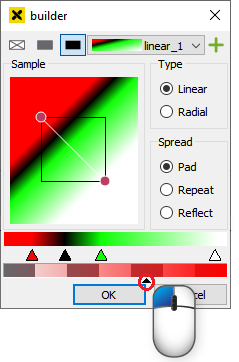
Adding a color stop
Add a color stop to the gradient by double-clicking somewhere in the area below the gradient color bar (where the other triangles are located) and choosing the desired color from the dialog which appears.
Add a color stop by double-clicking in the area below the gradient color bar
Changing the opacity of the whole gradient
Change the opacity of the whole gradient by dragging the small black triangle below the opacity bar or by clicking on the opacity bar.
Change the opacity by dragging the small triangle below the opacity bar
Changing the pen style
This tab allows you to change the following graphic attributes of the currently-selected element:
Line width (in pixels)
Line style
Type of line cap
Type of line connection
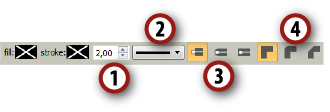
Controls of the pen tab
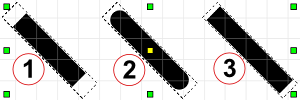
Different types of line caps
 Butt Cap
 Round Cap
 Square Cap
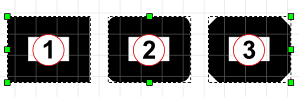
Different types of line connections
 Line width (in pixels)
 Line style
 Type of line cap
Changing the text style
This tab allows you to change the following graphic attributes of the current text element:
Text font
Text style (
 bold,
bold,  italic)
Text size
Text-align (
 left,
left,  centered,
  right)
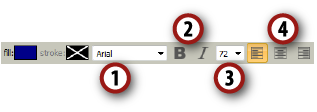
Controls of the text tab