Introduction
This part of the user guide explains how to draw displays and dynamize elements. As there are a lot of different functions, they are split up into six main categories, which are described in the next sections:
Basic drawing functions
Using quick dynamics
Simple dynamics
Display parameters
Object-oriented parameterization
Example: object display (simple bar)
In this section, we will continue with information on the editor, which is generally divided as follows:
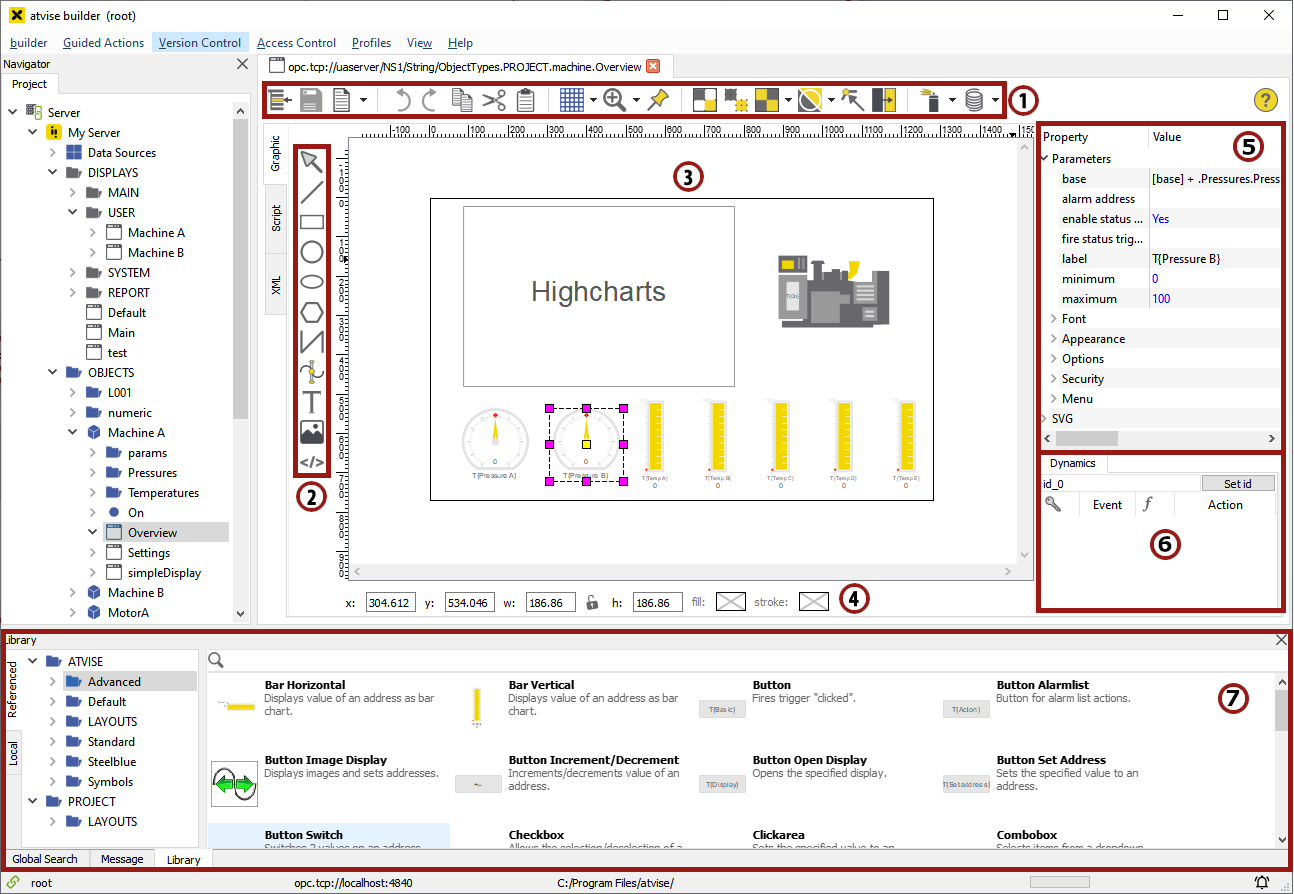
Toolbar: Area at the top which contains general commands (e.g. Save, Undo, etc.) and tools for arranging or adding elements. All tools are described in the following chapters:

Simple drawing functions
Dynamics:
Drawing tools: The drawing functions.
Drawing area: Area where you can draw, select and edit elements.
Attribute bar: Allows the user to edit SVG elements quickly (see also Attributes and styles)
Attribute area: Area which enables the user to change the attributes and styles of an element and to edit the parameters of a referenced display.
Simple dynamics: Area to add dynamics to elements or to manage them.
Library: Contains all atvise object displays and those the user has created.
Hint
The library also offers a search function!

Basic element handling
Selections
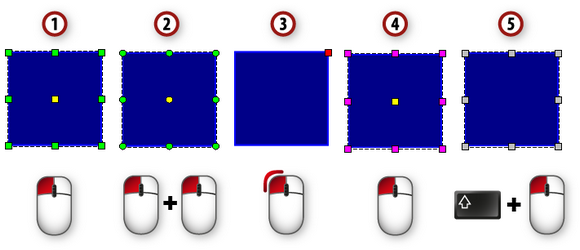
Click once to select an item and to scale it. (You can also select multiple items by holding down the Ctrl key while selecting.
Click a second time on an item to enable the rotation handles. Grab the edges to skew and the corners to rotate your item.
Double-click on an item to round the corners by dragging down the red handle. (For exact rounding, you can set specific values in the item's attributes afterwards.)
By selecting a referenced display, the pink handles will appear. You can also rotate a referenced display as described in 2.
To select an item inside a referenced display, hold down the shift key while selecting. This also works for grouped items.
Reference point

The reference point can be used:
to set the center of a rotation
to set the starting point of a dynamic transformation (Rotate, Scale)
Right-click on an item and select to set the reference point to its center point.
Scaling an element
Clicking on an element on the display will mark the element - with squares. Now the user can transform and scale the element as desired.

before
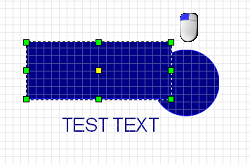
after
Rotating an element
Clicking a second time on an element will mark the element - with circles. By default, there is a yellow circle in the middle of the element which is the point of rotation. This point of rotation can be moved, even outside of the element, so that the element will not rotate around its center. Now the user is able to rotate and skew the element as desired.

before
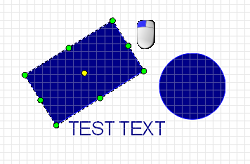
after
Editing mode
Double-clicking an element will enable the editing mode for this element. If you double-click a rectangle, for example, a red square will appear at the top right corner of the element. Moving this square lets the user change the look of an element by smoothing its edges.You can also change the single points of a line, a polyline, a polygon or a path in the editing mode.
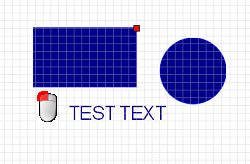
before
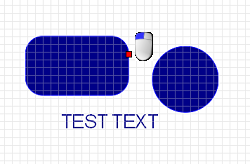
after
Rendering of foreign objects
When opening a display, rendering of foreign objects may take some time. While rendering is in progress the text Rendering: n object(s) is shown in the status bar of the display (to the right of the attribute bar). Please wait until rendering is finished and Rendering: succeeded is shown. If you switch away from the graphics editor while the display is being rendered, rendering may not complete and Rendering: aborted is shown. As only rendering is affected you can continue making changes to your display. If you want the display to be rendered completely, please click on ![]() to the left of the text and wait until the whole display is rendered.
to the left of the text and wait until the whole display is rendered.