Languages
atvise allows to display the visualization in different languages. The provided default languages for visualization elements like object displays are German and English. It is possible to add new texts and languages. The translation for each target language is derived from a meta language (English) that contains all texts defined within "T{}" as well as the "To Active" and "To Inactive" texts of alarm configurations.
Language nodes
All texts and translations are stored on specific nodes. Project-specific texts must be stored on a language node under Languages (SYSTEM.TRANSLATION). For every language there must be a separate node that contains all relevant texts and translations.

Hint
The default languages provided by atvise (English and German) in versions < 3.9 were stored directly under Languages. Starting with atvise version 3.9, only project-specific texts (as well as translations of atvise texts into languages other than German or English) are stored under Languages. All texts provided by atvise are stored on the following nodes:
Library ‣ ATVISE ‣ de/en (SYSTEM.LIBRARY.ATVISE) – Contains only translations for parameters of object displays. These texts are only used by the builder. Therefore, they are not included when generating or exporting a translation file.
Library ‣ ATVISE ‣ Languages ‣ de/en (SYSTEM.LIBRARY.ATVISE.TRANSLATIONS) – Contains all texts for object displays that are shown in the visualization, i.e. all texts marked with T{} in displays or display scripts as well as values of display parameters. These texts can also be translated into any other language. Custom translations for texts of the atvise library that are defined under SYSTEM.TRANSLATIONS take precedence over texts provided by atvise. Note: When texts of the atvise library are mentioned in this chapter, it refers only to texts of this node.
Therefore, if a current atvise library is imported into a project < 3.9, texts of the default languages are duplicated and stored under SYSTEM.TRANSLATIONS as well as SYSTEM.LIBRARY.ATVISE.TRANSLATIONS. The Update resources option of the Maintenance Tool removes those duplicates.
Translations stored on nodes can also be exported to an XML file to allow external translations as well as the transfer to other projects.
Translation files
- Generate translation file
Open the context menu with a right-click on Languages and generate a translation file with a left-click on .

This file contains all relevant atvise texts for the visualization, all "T{}" texts from all displays as well as the "To Active" and "To Inactive" texts from alarm configurations. It can be used to translate the texts into the respective language and import them into the appropriate node afterwards.
- Format of translation files
Translation files are XML files in the TS format (Translation Source) used by Qt Linguist. Example of an XML translation file:
<?xml version="1.0" encoding="utf-8"?>
<!DOCTYPE TS>
<TS>
    <context>
        <message>
            <source>Example</source>
            <translation>Beispiel</translation>
        </message>
        <message>
            <source>Cancel</source>
            <translation type="unfinished">Cancel</translation>
            <comment>Caption for Cancel button</comment>
        </message>
    </context>
</TS>
<source> – Contains the collected source texts that shall be translated, e.g. from T{Example} or T{Cancel}.
<translation> – The translated text. The type="unfinished" property allows to show the translator that the translation is not correct or completed.
<comment> – Allows to add information to help with the translation.
Hint
If you make changes to your translation file, be sure to distribute the files if a webMI server is used. On a scada server, the translation is applied at runtime.
Import and export of translations
- Export
Texts and translations of a node can be exported to an XML file via translation editor or GenerateTranslationsToFile function. If a node under Languages is exported, all texts and translations from the atvise library are also exported to the XML file. Therefore, the XML file contains all texts provided by atvise as well.
- Import
Texts and translations of an XML file can be imported into a node via translation editor or MergeTranslationsFromFile function. New items are added and existing items are updated if the translated text or the translation status of the items are different. This allows to import externally translated texts into a project or transfer translations from one project to another.
The following rules apply to the import of translation files:
Texts provided by atvise are not imported if there are identical items in the atvise library.
Example: The node SYSTEM.TRANSLATIONS.de is exported to an XML file. The file contains all custom texts as well as texts provided by atvise (including the German translations). If this file is imported into SYSTEM.TRANSLATIONS.de, the texts that are existing in the atvise library are not imported into SYSTEM.TRANSLATIONS.de.
Non-existent items on the node will be added.
If an item already exists on the node it depends on the translation status:
Text in file is translated – The item on the node will be overwritten.
Text in file is not translated (type="unfinished"), text on node is translated – The item on the node will not be overwritten.
The translation of neither the text in the file nor on the node is finished – The item on the node will be overwritten.
Comments will only be imported if there is no comment for the respective item on the node. Existing comments are not updated, regardless of the translation status.
Adding a language
The atvise builder offers the possibility of adding several languages for the visualization. Right-click Languages to open the context menu and click .
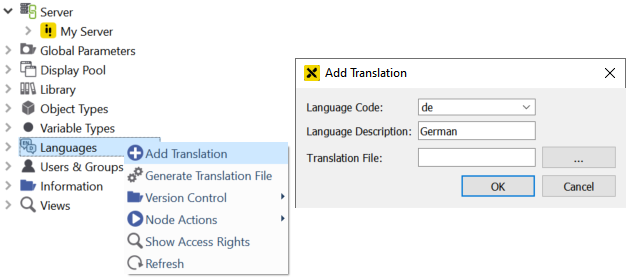
Adding a new language
Enter the Language Code (= name of the node) and the Language Description (it will be displayed in the language drop-down menu in the visualization) in the "Add Translation" dialog. The … button next to Translation file allows to select an XML file. All source texts and comments of this file are imported as basis for the new language.
Translation editor
A double-click on the respective language node opens the translation editor that allows to add, import or export texts and translations.

Toolbar:
 Save
SaveSaves all changes like adding, changing or deleting texts and translations.
 Reload
Reloads the table. Unsaved changes will be discarded.
 Add new translation
Adds a new text to the table. New texts are added with Source = KEY_<number> by default, since the source must always be unique.
 Delete selected translation(s)
Deletes the selected items in the table.
 Import and merge translations from file
Imports translations from the selected XML file. New items are added and existing items will be updated depending on the translation status (see Import section above).
 Export translations
Exports texts, translations and comments to an XML file. Depending on the language node, additional texts may be exported as well (see Export section above).
Hint
Changes in the editor must be saved, otherwise they will not be included in the export.
 Add and merge translations from node
Allows to select a language node and import its texts and comments. The following rules apply:
If an item is missing, source text and comment of the other node are added.
If there is an item without a comment, only the comment of the other node is added.
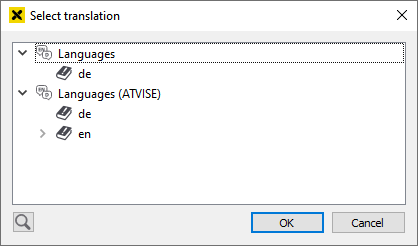
If project-specific texts as well as texts of the atvise library shall be added, both language nodes, the one under Languages and the one under Language (ATVISE), must be imported.
 Add missing translations from project
Browses the project for new texts (T{}, alarm texts) and adds them to the table. The texts of the atvise library are also added for all languages but English and German. Added texts are marked as not translated.
Hint
If the translation editor is opened for a node under SYSTEM.LIBRARY.ATVISE.TRANSLATIONS, only texts from the atvise library are added by this button. Project-specific texts will be ignored.
 Show unused translations
Only texts that are not used anywhere in the project are shown.
 Select language for column "Translation 2"
The translation of the selected language is displayed in the "Translation 2" column for comparison purposes.
Table:
T – Shows the translation status. If it is checked, the translation of the item is marked as completed.
Source – The source text that shall be translated.
Translation – The translated text.
Translation 2 – Allows to show the translation of another language. This column is only meant for comparison purposes and cannot be edited.
Comment – Allows to add information to help with the translation.
Using translations in builder
Existing source texts can be used in input fields (e.g. columns of global lists with type string, the "To Active" or "To Inactive" text of an alarm configuration) or in text fields of displays. Focus the respective field with a left mouse click and open the following selection dialog with CTRL + K:
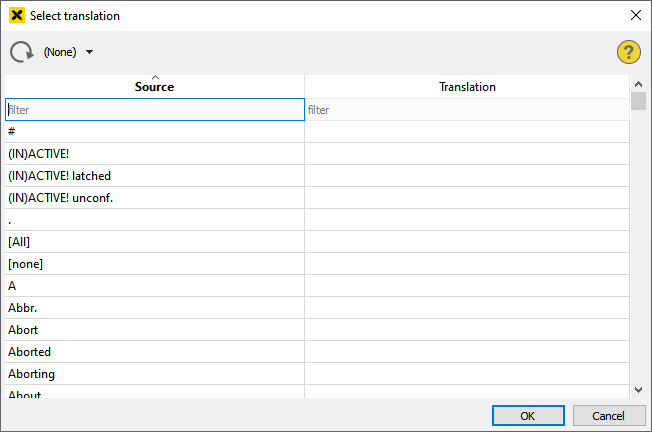
This selection dialog contains all source texts that exist in the project as well as in the atvise library. allows to show the translation of the respective language. Select the required text and confirm with OK. The selected text is inserted into the input or text field in the format T{source text}.
Hint
Text fields in a display must be focused (i.e. the cursor must be placed in the text field), not only selected. Otherwise, the keyboard shortcut CTRL + K does not work.
Displaying translations
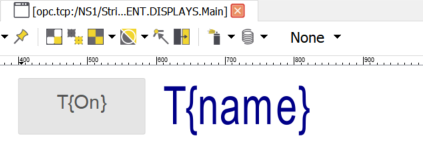
builder preview
The translation of all T{} texts in displays can be shown with the preview function . If there is no translation for the selected language, the source text (without T{}) is shown.
No preview language
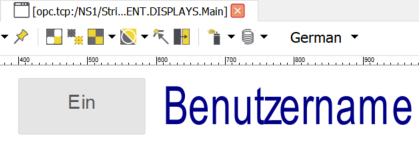
Preview - translation in selected language exists
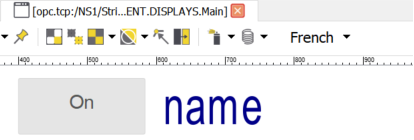
Preview - no translation exists
Displaying translations in the visualization
The displayed language in the visualization can be changed via  .
.
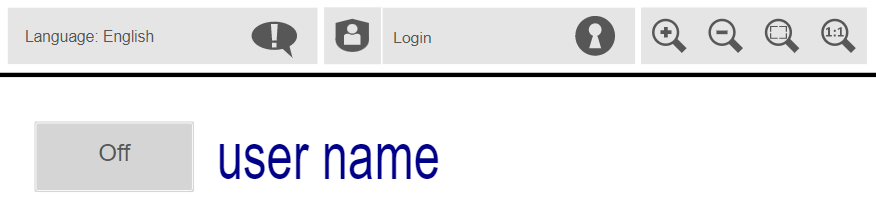
Translation in selected language exists
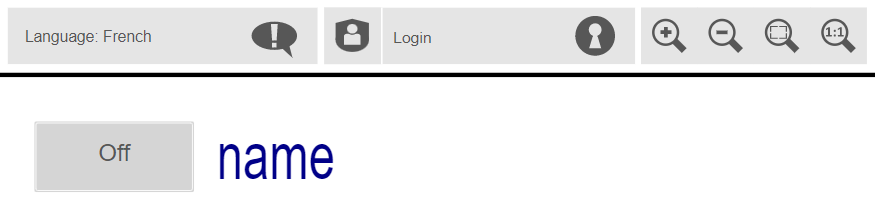
No translation exists