Introduction
The atvise builder is the engineering tool for your projects. Please start the atvise builder either from the program menu or the project console.
Hint
To assure the best possible collaboration between atvise builder and atvise server, an atvise builder can only connect to an atvise server with matching major and minor version number (e.g. a connection from atvise builder version 3.1 to atvise server version 3.1.1 is possible, but not from version 3.0 to 3.1).
If the atvise server refuses a connection, an appropriate message is written to the log file.
Command line parameters
If you start the builder via command line, the following parameters can be set:
-login – The server connection dialog is automatically opened when starting the builder.
-serverURL <URL> – Sets the server address in the server connection dialog when starting the builder.
-highDPI – Enables a high DPI mode for displays with increased pixel density.
Hint
Please note that depending on the used mode and other factors (operating system, number of monitors, defined resolution), there are several known scaling issues in Qt.
-resetgui – Resets settings (like windows size or position) to default before starting the builder
Server connection dialog
The following dialog to establish the connection to a server is automatically displayed after launching the atvise builder.
User
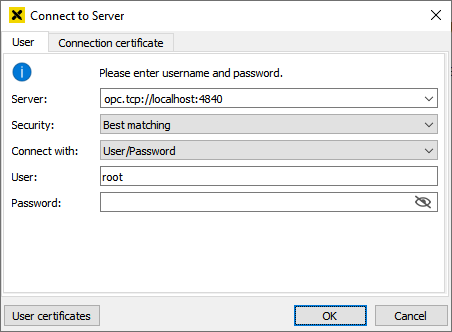
- Server
Specifies the address of the atvise server to connect to. The local host and the standard OPC UA port ("opc.tcp://localhost:4840") are preconfigured.
- Security
Defines the security policy for the connection. Available options:
Best matching (Default)
None
Basic256Sha256 Sign
Basic256Sha256 SignAndEncrypt
- Connect with
Defines the connection method. Available options:
User/Password (Default) – If selected, username and password must be provided.
Certificate – Allows to log in with a user certificate.
Certificate store – The certificate store for user certificates (default: %LOCALAPPDATA%\atvise\PKI\users). … allows to select another directory.
Certificate – The user certificate that shall be used for the login. Clicking User certificates opens the Certificate management to create and manage user certificates. Note: A user certificate must be assigned to an atvise user (see user management).
Private key – The corresponding private key. Automatically matches the name of the selected user certificate (with file extension .pem) and cannot be changed.
For the initial connection to the atvise server in a new project, a login with the root user is required.
Connection certificate
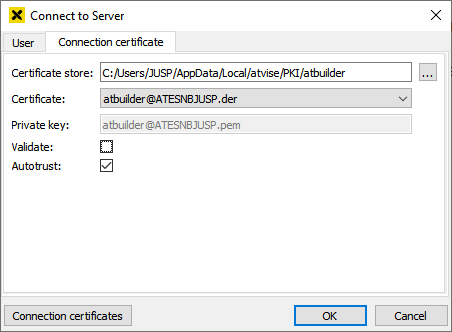
If certificate verification is enabled (see chapter Certificates for further information), the certificates for establishing connection must be defined here.
- Certificate store
The certificate store for the atvise builder (default: %LOCALAPPDATA%\atvise\PKI\atbuilder). … allows to define another directory.
- Certificate
The certificate that shall be used for the connection.
- Private key
The corresponding private key. Automatically matches the name of the selected certificate (with file extension .pem) and cannot be changed.
- Validate
Defines whether certificates must be checked for validity.
- Autotrust
Defines whether certificates shall be automatically trusted or must be explicitly accepted.
Overview
The builder is structured as follows:
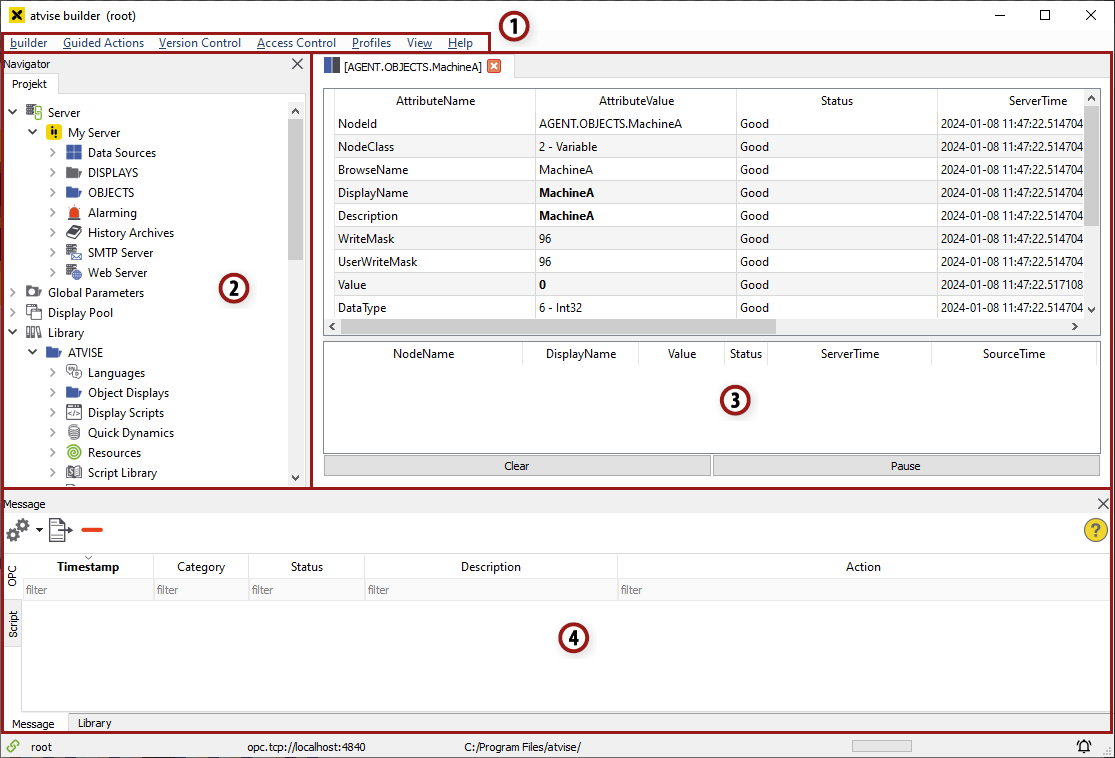
2. Tree
Area to browse through the structure of your project. You can edit the view in the builder preferences.
3. Editor and Viewer
Double-clicking elements in the tree will open a dialog or a new tab in this section. Depending on the selected element, the respective editor (e.g. for editing displays, scripts, alarms, users, etc.) is opened or node informations will be shown.
As soon as an element has been modified in an editor, this will be indicated by a "*" next to the name of the tab. When double-clicking displays, scripts or quick dynamics they will be locked automatically to enhance multiuser engineering. Opening such an element by another user (atbuilder) will result in the following message:
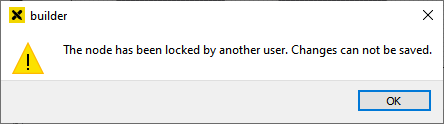
The suffix "[RO]" next to the name of the tab indicates that an element is locked.

Locked elements can be modified but cannot be saved - the functions "Save as" and export are still available. The lock will automatically be removed when the tab or the atvise builder is being closed.
Second window
The menu entry opens a second editor and viewer allowing to edit several displays or scripts simultaneously. However, it is not possible to open the same element simultaneously in both the main and the second windows.
The second window can be docked and undocked by double-clicking or via drag & drop. This allows it to be opened as a separate application window.

Open elements can be moved between the windows using the context menu (right-click) with the options "Move to Second Window" and "Move to Main Window".

4. Global Search / Message / Library
The windows Global Search, Message and Library are shown in this section. You can open these windows via .
Global Search
The global search allows to search the address space for node names and node content containing a given string. See also atvise builder > Menu > Global Search.
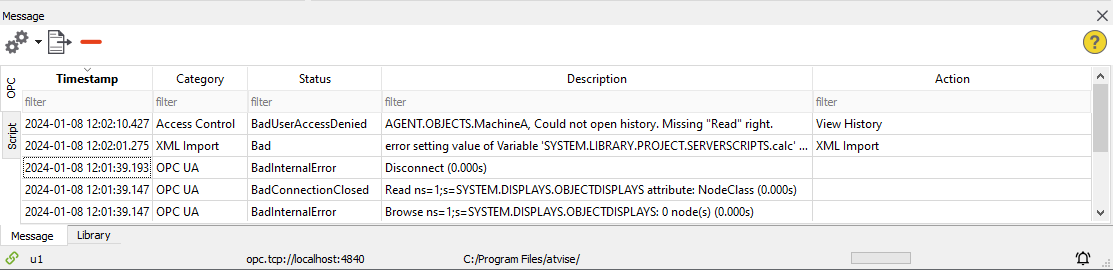
Message
This window can be opened via  . It shows several errors and messages for the current builder session. There are the following two types of messages:
- OPC
This tab shows OPC UA (error) messages for the current builder session.
Message log window
 > Show All OPC UA Messages
Defines if all OPC UA messages or only errors shall be shown.
- > Auto Scroll
Depending on the sorting order, it is automatically scrolled up or down if new messages occur.
 Export
Allows to export all entries to a CSV file.
 Delete
Deletes all log entries.
- Timestamp
Timestamp of the message.
- Categoriy
Shows the (error) source. Currently there are two categories: OPC UA and Access control.
- Status
OPC UA status code (good, bad, warning, info)
- Description
Provides additional information for a message, e.g. the ID of nodes in case of failed actions.
- Action
The action (e.g. drag & drop, create or delete node, etc.) that resulted in an error or a message.
Hint
Regular expression patterns can be used to filter the messages. The filters of the columns can also be combined. Refer to the Global Search chapter for more information on regular expressions.
- Script
This tab shows syntax errors that are detected in the script code.
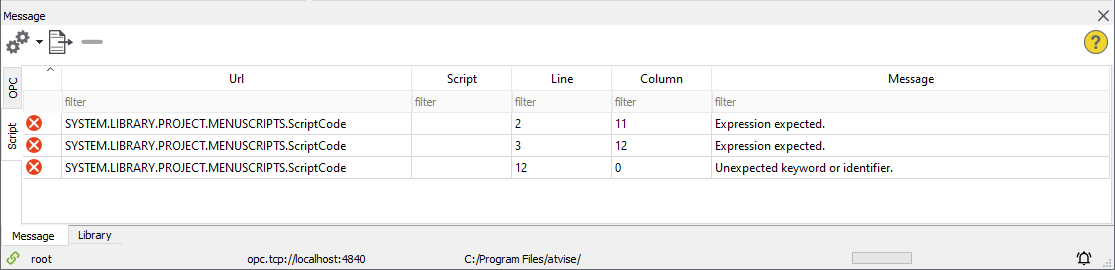
- Url
The script or display in which the syntax error was found.
- Script
The type of the script block, e.g. Linked or Embedded.
- Line
Shows in which line of the script the error was detected.
- Column
Shows at which position of the line the error was detected.
- Message
The error message.
Library
There are two different library folders:
ATVISE: This folder contains the atvise standard catalog (e.g. object displays, quick dynamics) and is not to be modified. Any modifications will be overwritten if a new atvise standard catalog from a new atvise version is installed.
PROJECT: Use this folder for project-specific modifications and extensions (e.g. own object displays). Elements in this folder supersede elements in the ATVISE library if they have the same name.