Introduction
The simple dynamics dialog enables you to add dynamizations to your display to create a fully functioning visualization with minimum effort. It offers you many different ways to influence existing graphic elements or data variables.
Dynamics toolbox
The dynamics toolbox is located at the bottom right of the graphics editor interface. It shows a list of all simple dynamics of the currently-selected element and enables you to add, edit and manage dynamics.
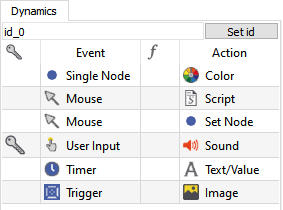
Dynamics toolbox
Right-click to see the following functions:
 Add a dynamization - The simple dynamics dialog will be opened for the new dynamization automatically.
 Edit the dynamization which is selected in the list. You can also double-click a dynamization in the list.
 Copy a dynamization.
 Delete a dynamization.
Hint
Double-click on the whitespace in this area to add a dynamization.
Double-click on an existing dynamization to edit it.
Standard method
The following describes the standard method for simple dynamics and the related steps in the simple dynamics dialog.
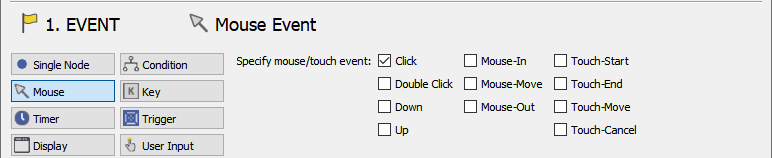
1. EVENT: First, an event has to be fired (for example a specific interaction of the user in the visualization, change of a data variable, …).
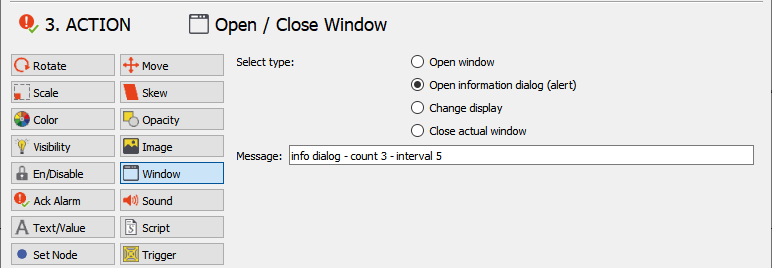
3. ACTION: When this event is fired, an action will be executed which has an influence on elements in the display or data variables.
Optional steps:
0. RIGHT: A certain user right can be defined as a requirement to execute the action of the event.

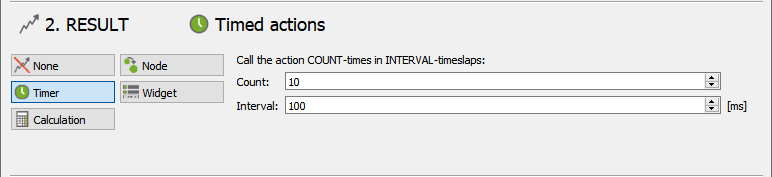
2. RESULT: The result of the event can be defined (for example modify the value of the event, start a timer, …).
Address selector
In the "Simple Dynamics" dialog, the address selector is used quite often. For example, to choose a display or to set a node address. The address selector is split up into three categories.
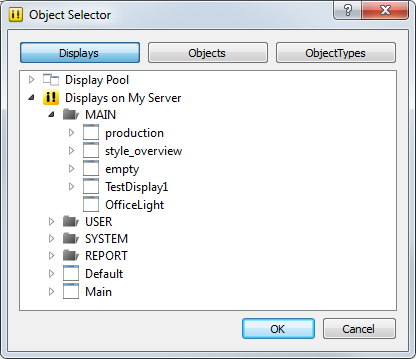
Displays
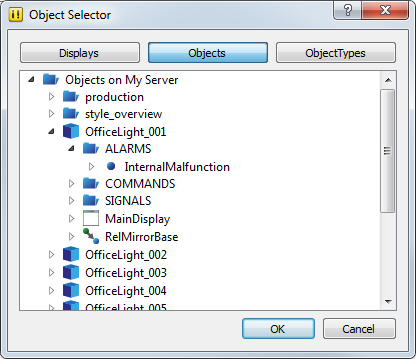
Objects
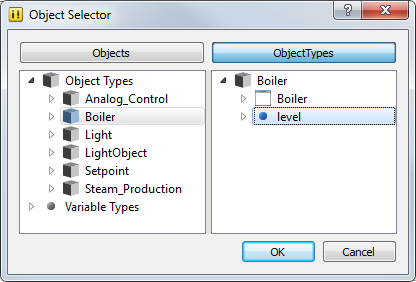
Object types
Attention
If you choose "Object Types" in your Object Selector, note that you have to select the Object Type in the left column first and then select the data variable of the chosen type in the right column (as shown in the screenshot above) to create a correct relative addressing.