First connection using self-signed certificates
This chapter describes how to configure atvise and establish the connection with self-signed certificates for the first time.
Connecting atvise builder and server
Configuration
atserver.ini:
[certificates]
autotrust=false
validate=true
atbuilder:

Connection establishment
The atvise server sends its certificate to the atvise builder when connecting for the first time. Because of the configuration above, the certificate is automatically rejected and moved to the "rejected" folder in the builder's certificate store. Click the Connection certificate button in the connection dialog to open the builder certificate management:

Use the dropdown list to switch to Peers to trust the atvise server certificate:

You can trust the certificate by clicking the  button. The certificate will be moved to "trusted" directory in the builder certificate store. If you try to connect again, the atvise builder sends its certificate to the atvise server, which will also reject it. Open the server certificate management in your browser via <server IP address>/?admin=true:
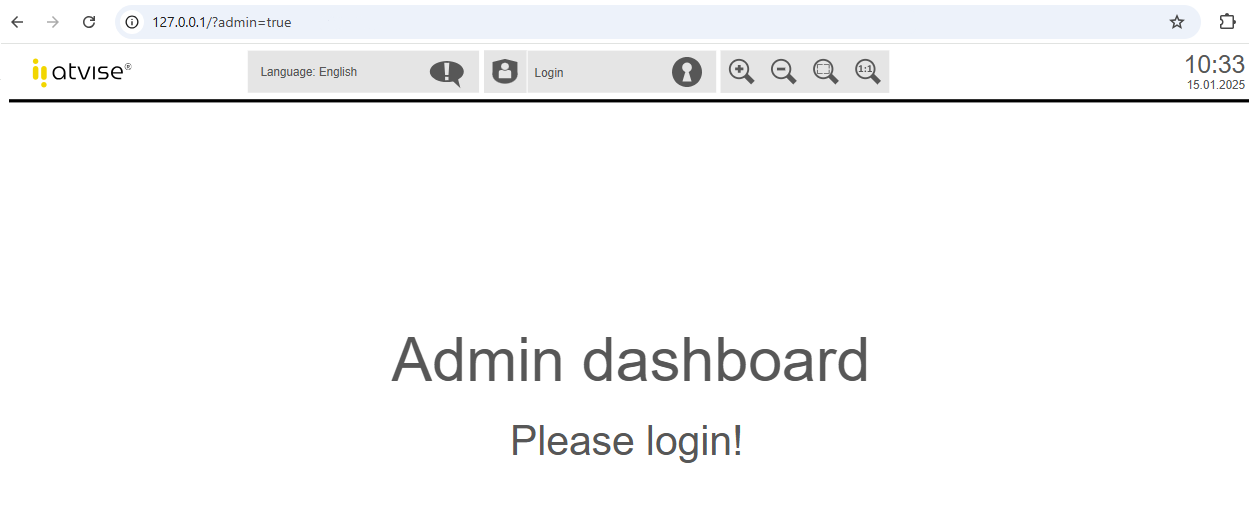
Log in with admin credentials to manage the certificates:

Use the dropdown list Type to switch to Peers to trust the atvise builder certificate:

Select the certificate and click the Trust button. The certificate will be moved to the "trusted" directory in the server certificate store. After that, the connection between atvise builder and atvise server can be established.
Login with user certificates
Connection establishment
Select the connection method Certificate in the connection dialog:
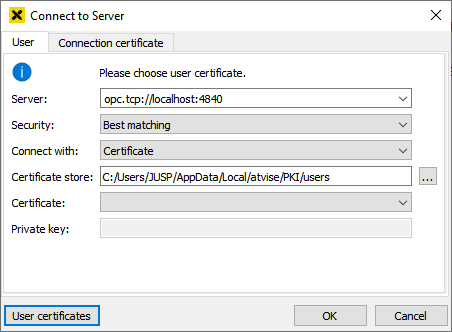
Click User certificates to open the certificate management for user certificates. Create a new user certificate by clicking ![]() :
:
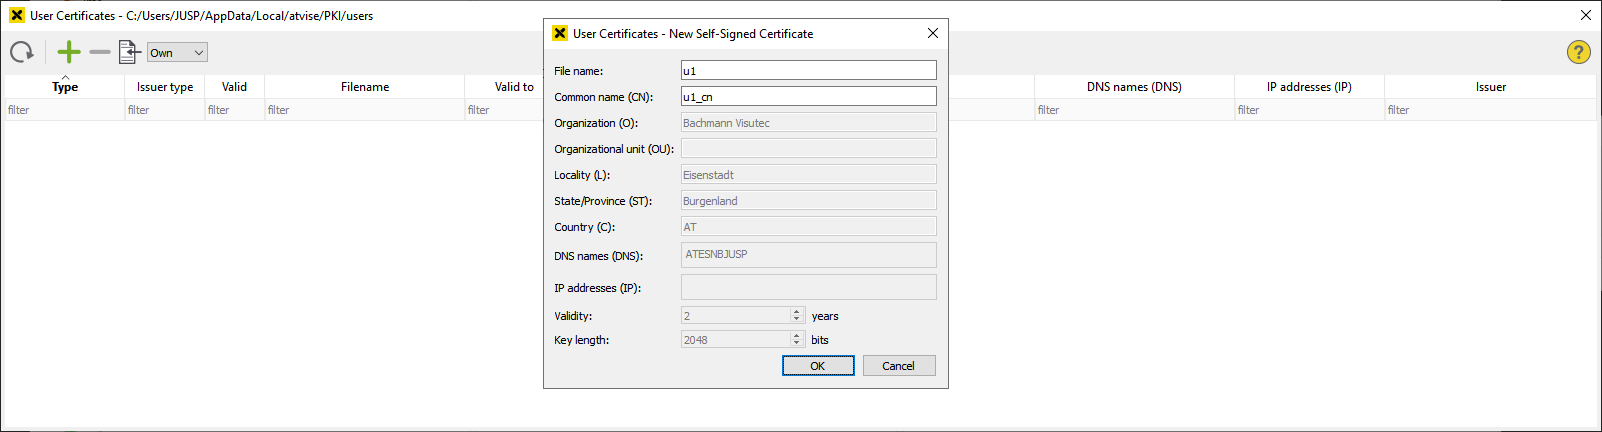
Enter the file name of the certificate and the CommonName. CommonName must be a username. The user certificate will be stored in the appropriate certificate store (%LOCALAPPDATA%\atvise\PKI\users\own).
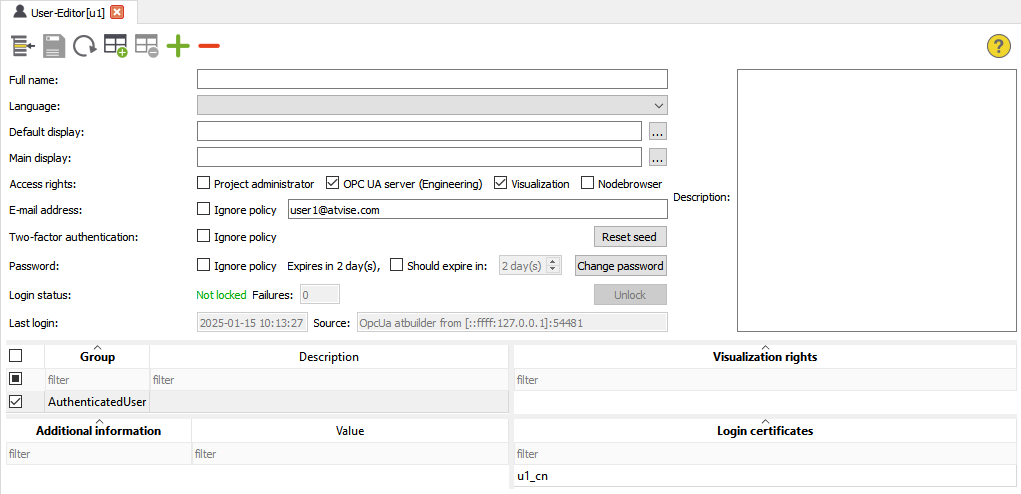
User management
The newly created certificate must be assigned to the user by an administrator in atvise. Open the user management for the atvise user, click ![]() to create a new entry under Login Certificate and enter the CommonName of the user certificate:
to create a new entry under Login Certificate and enter the CommonName of the user certificate:
Accept certificate
If autotrust = false is configured for the server, the user certificate must be trusted to enable a successful login. Open the server certificate management in the browser and use the dropdown list Type to switch to User. Trust the user certificate as described before:

The user can now successfully log in with the user certificate. The window title shows that the user is logged in with a user certificate:

Connecting to data sources
Configuration
Open the configuration dialog of the respective data source and switch to the Security tab:

Using this settings, the certificate of the peer, i.e. the connected data source, must be explicitly accepted when establishing a connection. Click … to select the local certificate that will be used for communication with the data source. The atvise server certificate is copied to the certificate store (<atvise_directory>\PKI\atserver\mirror) and used as client certificate by default.

Accept certificate in atvise
Open the server certificate management, set the Store dropdown list to OPC UA data sources and the Type dropdown list to Peers to display the rejected certificate of the data source:

Select the certificate and click Trust to accept it.
Accept certificate at data source
Depending on the connected data source and its configuration, the data source needs to trust the atvise server certificate to establish the connection. For example, if the data source is the opcuatestserver started with parameter --cert_autotrust=off, the atvise server certificate must be moved from "rejected" to "trusted" in the certificate store (<atvise_directory>\PKI\opcuatestserver).