2 Add server and import data variables
2.1 Adding and configuring a demo server to the project
In the first step, we will add a "webMI DEMO Webserver" to the project. To do so, we will use the "Guided Actions" located in the menu bar.
Choose from the menu bar.
Choose a project directory for the demo server.
Now you can choose a layout and size for your default display.
Hint
The webMI DEMO Webserver will start in a console window. The server uses port 81 to deliver the webMI visualization.
Hint
You could also start the DemoServer after adding it to the project by choosing
Confirm the dialog which appears by clicking Yes to start the demo web server (if you haven't started it yet).
Now the "DemoServer" appears in the server list at the upper left side of the atvise builder interface
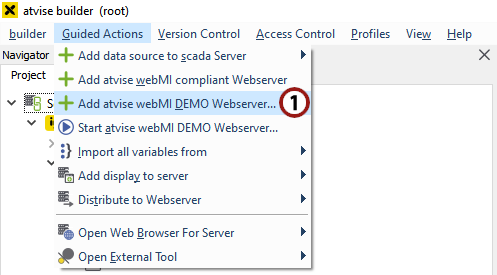
Adding an atvise webMI DEMO Webserver to the project

The DemoServer appears in the server list
2.2 Importing data variables
In this step, we will import the data variables that are integrated in the "DemoServer" (the corresponding data structure is defined in the variables.xml file located in the [atvise_folder]/webmi folder).
Choose from the menu bar.
Confirm the dialog which appears by clicking Yes. Now the data variables will be imported into the atvise builder's object structure.
A window will appear, informing you that all variables were imported successfully. Apply the dialog by clicking OK.
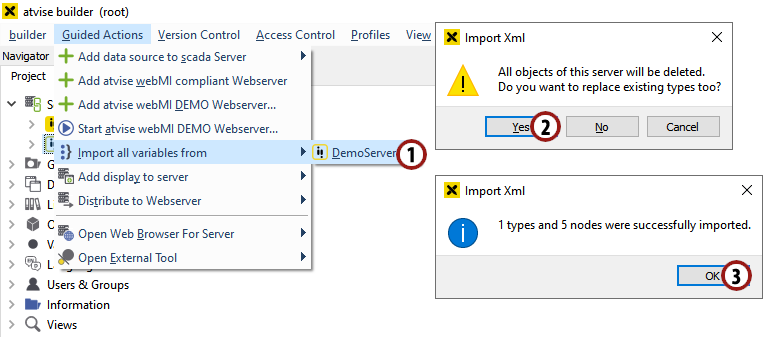
Import the data structure of the DemoServer (defined in the variables.xml file)