4.3 Using quick dynamics
In this section, we will take a look at how to use quick dynamics to add dynamization to your own graphic elements.
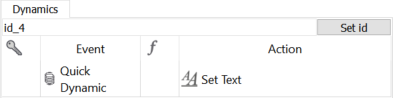
4.3.1 Textual display of a data variable
Add a new text element to your display.
Mark the text element and choose "Quick Dynamics -> Set Text".
Select the "testInt" data variable for the "Node from which value will be taken" property by using the
 selector.

Create a dynamic text using quick dynamics
Hint
Afterwards, you will see an entry for this quick dynamization in the dynamics list of this text element located on the lower right side of the atvise builder interface. To edit or view an existing quick dynamic, simply double-click on the entry:
4.3.2 Drawing a simple button to set the testInt variable to 100
Click on the "Add polygon" symbol to select the polygon drawing tool. We want to use this tool to draw a triangle.
Click somewhere in the drawing area, then move the mouse to draw the first side of the triangle. Click again and move the mouse to draw the two remaining sides. Finish the drawing by double-clicking.
Give the triangle a button-like look by choosing one of the design templates. Make sure the triangle is marked, then click on "Templates". Choose one of the templates in the menu which appears by simply clicking on it.

Drawing a triangular button
4.3.3 Dynamizing the button to set the testInt variable to 100
Make sure the triangular button is marked, then chose "Quick Dynamics -> Set Node"
Select the "testInt" data variable for the "Node to be set " property by using the
selector.Type in "100" as value. Now the "testInt" variable will be set to 100 if you click on this element in the visualization.
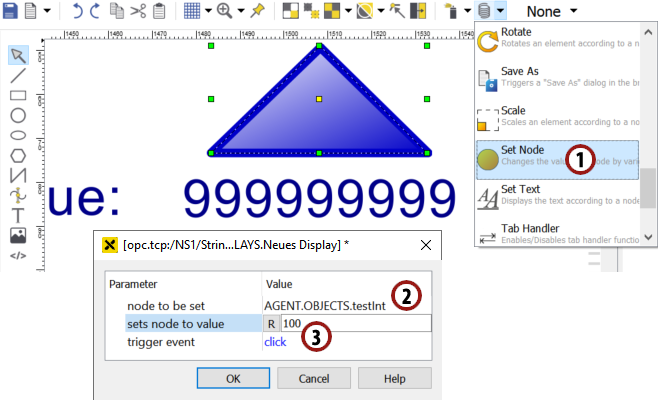
Dynamizing your own element to set the value of testInt to 100
4.3.4 A simple button to set the testInt variable to 0
Create and dynamize a second triangle the same way as described in the last two sections, but now enter "0" as the value instead of 100.
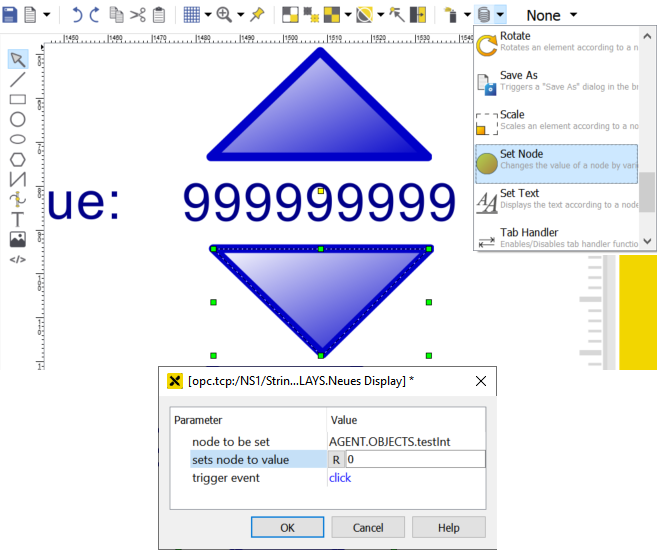
Creating a second element that sets the value of testInt to 0
4.3.5 Opening the browser and testing the controls
Save the display, then open "TestDisplay2" in your browser and change the value of the "testInt" data variable by clicking on your new controls. You will see the results by looking at the dynamized text element and the bar.
Hint
Please note that you have to log in as user root (as described in section 4.2.4) in order to change values.