10 Adding user rights
In this section, we will create a user right which will be required to change the "LightIntensity" value in the visualization. For this purpose we will:
add a user-defined right to the project
add a new group for this right
add a user to this group
and, finally, check this right in the visualization.
10.1 Adding a right to the project
Open the users & groups view by clicking on the "Users&Groups" tab on the left if the atvise builder interface.
Open the "Rights" folder and right-click on "Userdefined rights".
Choose "Add right" from the menu which appears.
In the dialog which appears, you can type in a name for the right; for our example we will choose "change_light_intensity".
Add the right by clicking "OK".

Add a right to the project
10.2 Adding a group to the project
Right-click on the "Groups" folder.
Choose "Add group" from the menu which appears.
Name the group "Administrator" in the dialog which appears.

Adding a group to the project
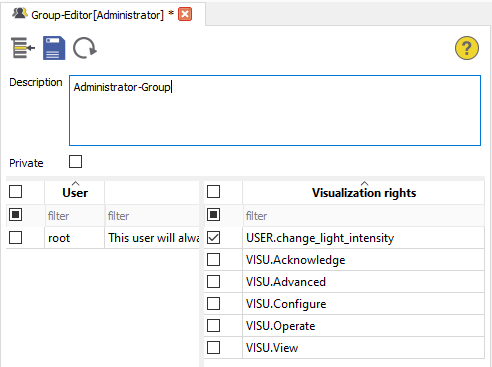
An entry for the new group is added under the top group folder; double-click on it to open the "Group Editor".
Type in a description, for example "Group of Administrators".
Check the "USER - change_light_intensity" entry in the "Rights" list.
Save the changes.
10.3 Adding a user to a group
You can add users directly to a group. To do this, right-click on the "Administrator" group entry.
Choose "Add new user" from the dialog which appears.
Name the user "admin1".
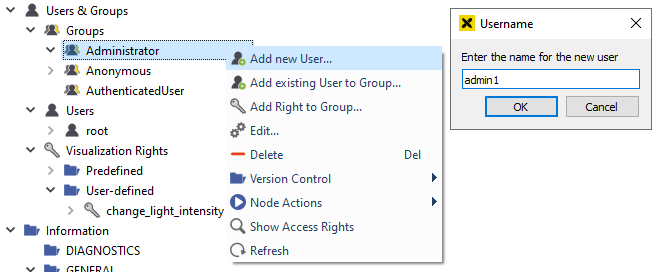
Creating a new user, "admin1"
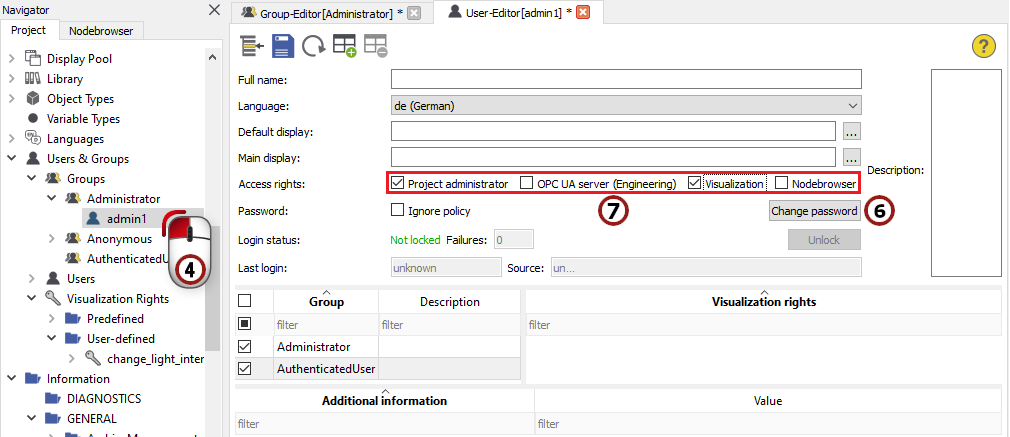
An entry for the user is added under the "Administrator" group folder. Double-click on this entry to open the user editor.
Type in a name, description and language.
Click on the "Set Password" button and type in a password of your choice.
Enable the "Project administrator" and "Visualization" options for the user (see access control for further information).
Save the information by clicking
 .
.
Setting user access rights
After this, double-click on the "Administrator" group again. You will see the new user in the users list.
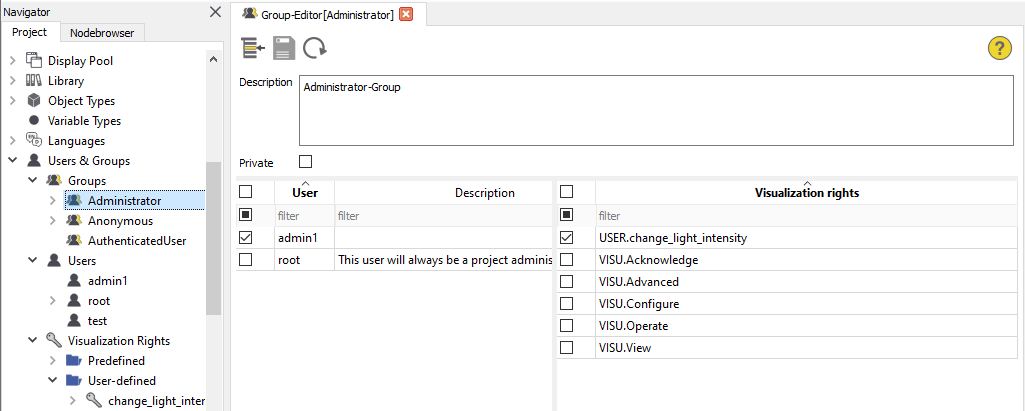
Group editor for the "Administrator" group
10.4 Adding right checking to the buttons of the light object
Finally, we want to check our new right in the visualization.
Go back to the objects view by clicking on the "Objects Types" tab on the left side of the atvise builder interface.
Open the structure of the "Light" object and double-click on the "MainDisplay".
Click on one of the buttons to mark it. On the right of the atvise builder, you can see the "Attributes" window belonging to this button.
Open the "Security" tab and choose "change_light_intensity" as the necessary right by using the
 selector.
Add the same right checking to the other two buttons.

Adding right checking to the three buttons
10.5 Checking the right in the visualization
Load the "Office_Light" display in the visualization.
Try to change the light intensity by clicking on the buttons of one of the objects. You will notice that the buttons are inactive now because you don't have the necessary user right.
To gain the necessary right, you have to log in as "admin1". Click the Login button in the control panel and type in "admin1" and your password in the dialog.
After the login, you will finally be able to change the light intensity by using the buttons.

Logging in with the new user