Certificate management
atvise builder
Certificate management in atvise builder can be opened for connection and user certificates separately.
Connection certificates
The certificate management can be opened via or the Connection certificate tab in the Login dialog.

The dropdown list allows to select the respective subdirectory of the certificate store (\PKI\builder):
Own
Peers (\rejected and \trusted)
Issuers
Create certificates
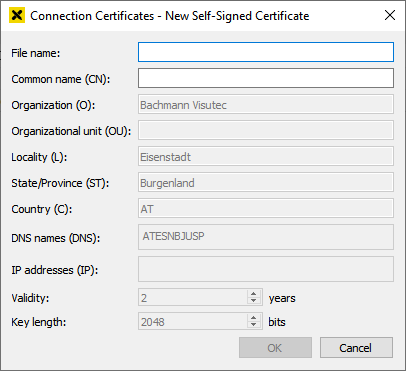
![]() creates a self-signed certificate for the builder. The file name and CommonName must be defined in the following dialog. Additional information is automatically taken from the cert.ini file.
creates a self-signed certificate for the builder. The file name and CommonName must be defined in the following dialog. Additional information is automatically taken from the cert.ini file.
Delete certificates
![]() deletes the selected certificates (as well as the corresponding private keys) from the file system.
deletes the selected certificates (as well as the corresponding private keys) from the file system.
Import certificates
![]() allows to import self-signed or issued certificates into the respective directory.
allows to import self-signed or issued certificates into the respective directory.
Accept or reject certificates
 and
and  allows to trust or reject certificates received from peers. The certificates are moved to the "trusted" or "rejected" directories respectively.
User certificates
The user certificate management can be opened via the User tab in the Login dialog.
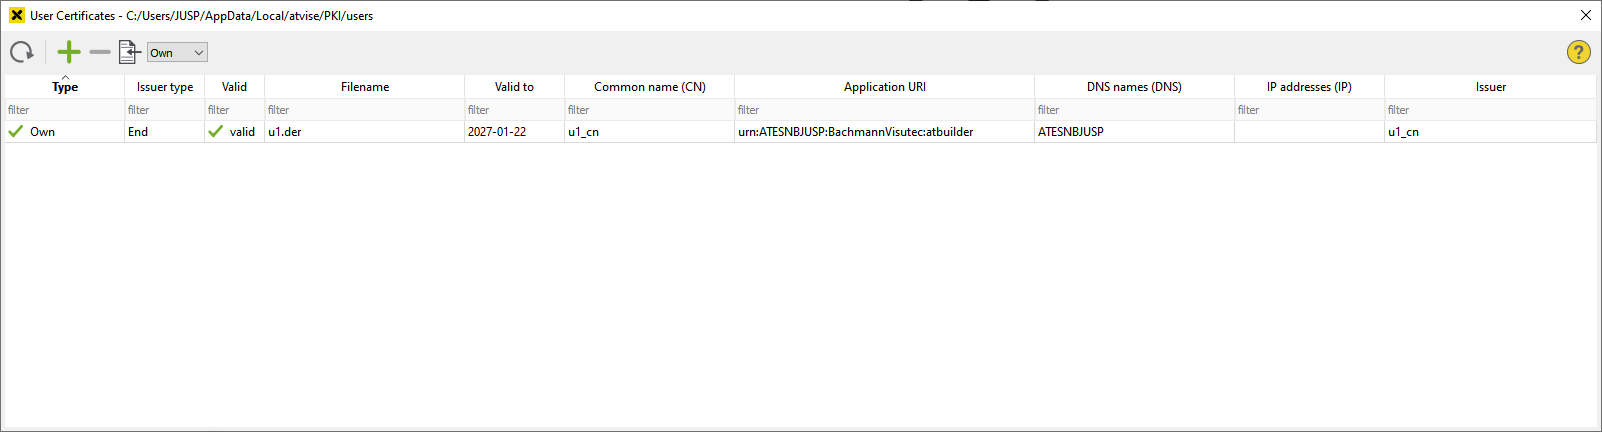
The dropdown list allows to select the respective subdirectory of the certificate store (\PKI\users):
Own
Issuers
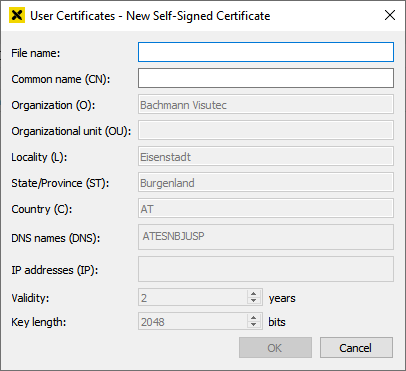
Create certificate
![]() creates a self-signed user certificate for server authentication. The file name and CommonName (must be a username, e.g., the atvise user) must be specified in the following dialog. Additional information is automatically taken from the cert.ini file. The user certificate must be assigned to the atvise user by an admin (see user management).
creates a self-signed user certificate for server authentication. The file name and CommonName (must be a username, e.g., the atvise user) must be specified in the following dialog. Additional information is automatically taken from the cert.ini file. The user certificate must be assigned to the atvise user by an admin (see user management).
Delete certificates
![]() deletes the selected certificates (as well as the corresponding private keys) from the file system.
deletes the selected certificates (as well as the corresponding private keys) from the file system.
Import certificates
![]() allows to import self-signed or issued user certificates into the respective directory.
allows to import self-signed or issued user certificates into the respective directory.
atvise server
Authorized users (project administrators or users with right Engineer for system function "Security") can manage certificates and create self-signed certificates using the Certificate Manager display. This display is available in the browser when opening the visualization with URL-Parameter "/?admin=true". This means that this display is accessible as soon as the atvise server is started.

The table lists all available certificates with information regarding issuer type (ROOT, INTERMEDIATE, END), status, validity period and other certificate fields.
The dropdown lists Store and Type are meant for selecting the respective certificate stores:
OPC UA Server (\PKI\atserver)
Own
Peers (\rejected bzw. \trusted)
Issuers
Users (\users\rejected bzw. \users\issuers)
OPC UA Datasources (\PKI\atserver\mirror)
Own
Peers (\rejected bzw. \trusted)
Issuers
Users (\users\own)
User issuers (\users\issuers)
HTTPS (\PKI\atserver\https)
Own
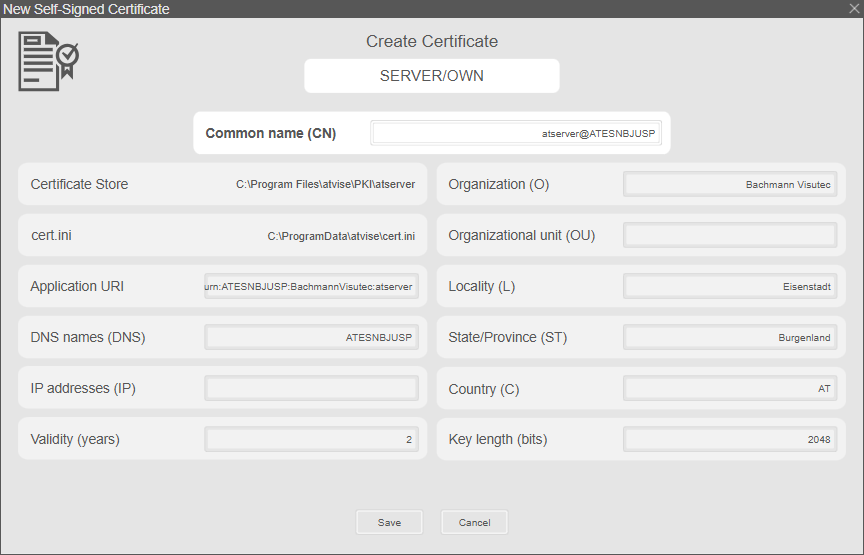
Create certificate
Self-signed certificates can be created for the "own" directory of the respective certificate store via Create. Only the CommonName must be specified in the following dialog, all other information is automatically taken from the cert.ini file.
Upload certificates
Self-signed or issued certificates can be uploaded into the respective directories via Upload. In the following dialog, the certificate (and the corresponding private key in case of own certificates) must be selected.
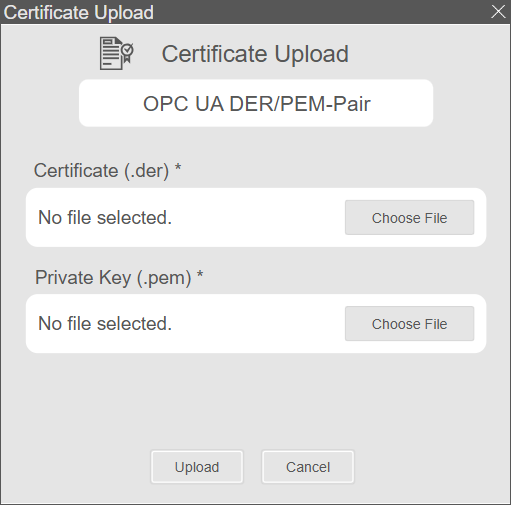
Hint
In case of HTTPS, only a PEM file can be selected because the file must contain the certificate (or the certificate chain) and the private key.
The field Common Name allows to define a name, that will be used for the certificate and the private key.
Accept or reject certificates
Certificates can be moved to the "trusted" or "rejected" directories by using the Trust and Reject buttons.
Show certificate information
Detail information of the respective certificate can be displayed by clicking the respective ![]() button.
button.
