1 Start atvise
1.1 Starting atvise server
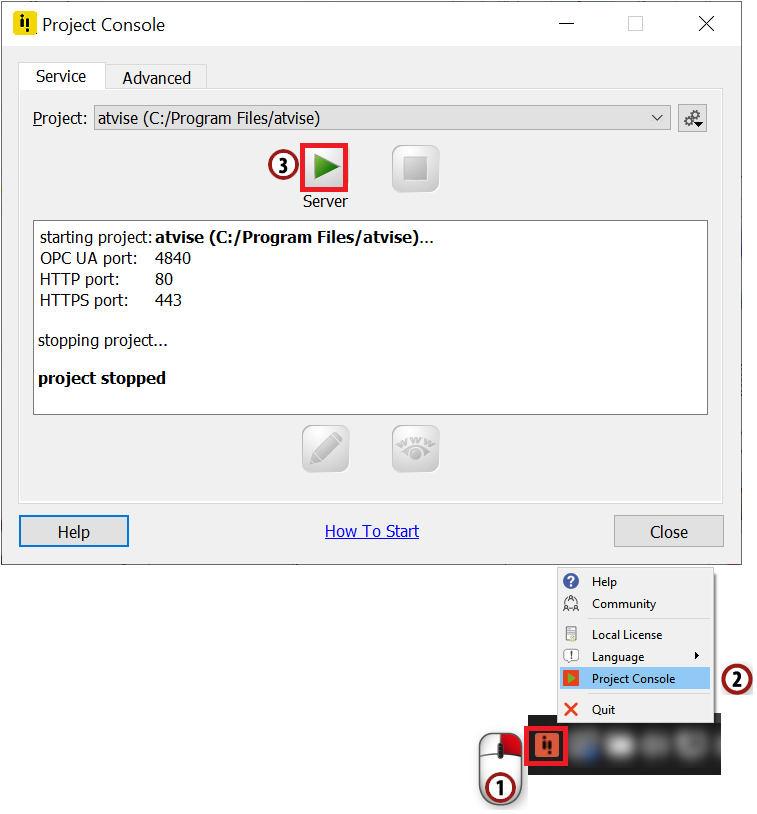
If atvise has been activated successfully, the server will start automatically (green icon in the taskbar), otherwise follow these steps to start the server manually:
Right-click on the atvise icon in the right corner of the task bar.
Choose "Project Console" from the menu which appears.
Start the server by clicking the button shown in the picture below.
The icon in the task bar will change its background color to yellow when the server is booting. When the server has started, it will turn to green.
Starting atvise server
Attention
The atvise server is up if the icon in the task bar is green  ("atserver" service is running). Otherwise, you won't be able to connect to the server. If the server doesn't come up after starting it, check out the "atserver_std.log" file in your atvise installation directory for potential error messages.
Hint
The atvise server uses the standard OPC UA port 4840 to communicate with atvise builder. If you encounter any problems with starting the atvise server, please make sure that no other application uses this port.
1.2 Starting atvise builder
Right-click on the atvise icon in the right corner of the task bar. Open the "Project Console" and click on "Builder" to open the atvise builder.
Hint
You can also choose from your Windows start menu.
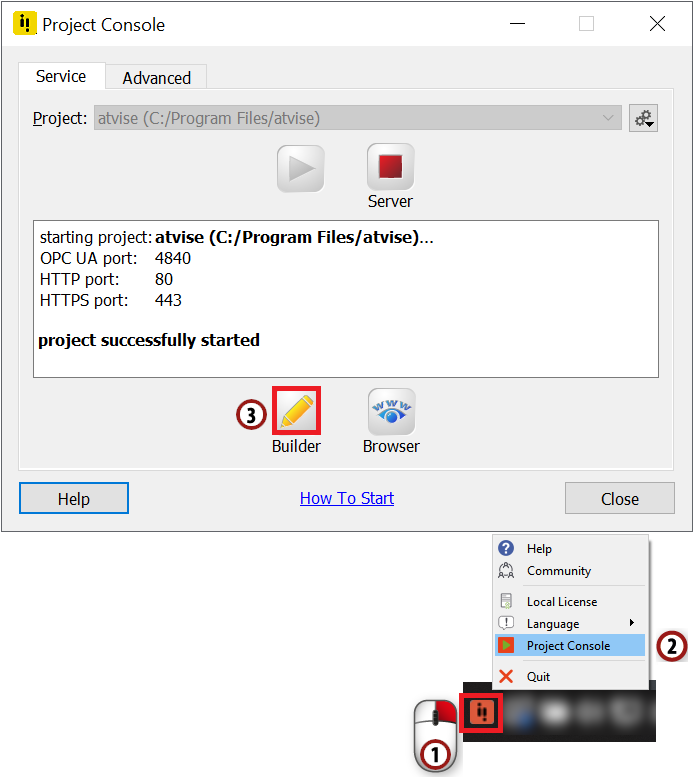
Starting atvise builder
1.3 Connecting to a server
After starting the atvise builder from the task bar, you will automatically be connected to the OPC UA module of the atvise server on your local machine.
If you start the atvise builder via the Windows start menu or if you want to connect to another server, you can do so by following these steps:
Choose from the menu bar.
A dialog will appear in which you must enter the address of the server to which you want to connect (opc.tcp://[host]:[port]). The default is your local host and the default OPC UA port ("opc.tcp://localhost").
Hint
You could also enter the address of another server instance, for example, the IP address of a machine in your local network.
Apply the dialog by pressing the OK button to connect your atvise builder to the server.
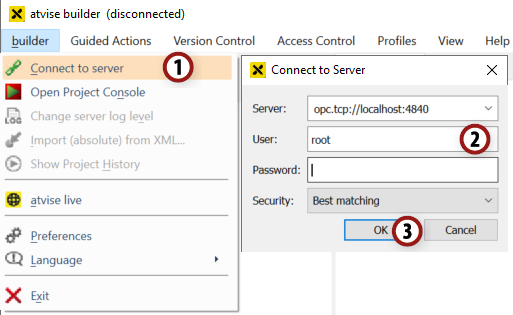
Connect to server on localhost
Hint
If you want to connect to another server, you first have to disconnect the current session by choosing from the menu bar.
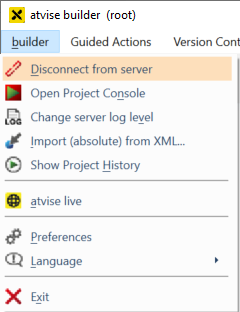
After that, choose again and connect to the new server the same way as described before.
Hint
You can see the currently selected server address at the top left of the atvise builder interface.
