4.1 The first dynamics
In this section we will change the properties of some graphic elements in dependence on the value of data variables.
4.1.1 Adding data variables to the project
First, we need some data variables which we want to display in the visualization. For this purpose, click on the "Objects" tab on the left of the atvise builder interface. You will see some objects ( ) and data variables (
 ) from the demo in the list.
For our example, we will add the following data variables:
"testString" of the data type "String"
"testBool" of the data type "Boolean"
"testInt" of the data type "Int16"
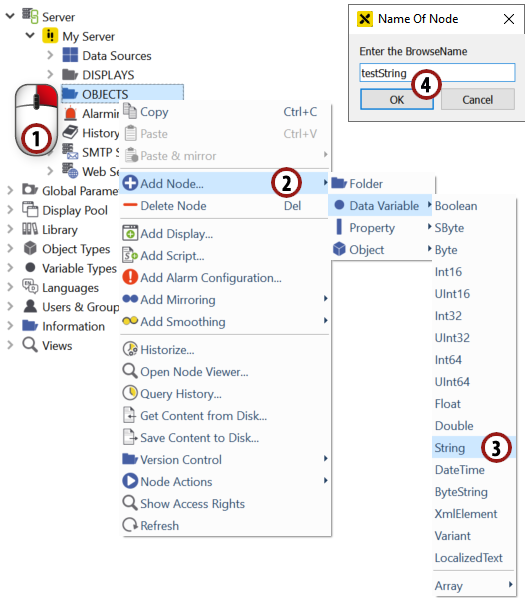
Right-click on the "Servers -> My Server -> Objects" folder.
Choose "Add Node -> Data Variable" from the menu which appears.
Choose "String" from the data types list.
Type in "testString" in the dialog which appears and apply the variable name by clicking "OK".
Add a data variable "testBool" of the data type "Boolean" in the same way.
Add a data variable "testInt" of the data type "Int16" in the same way.
Add data variables
4.1.2 Reading and changing values of data variables
After working through the last section, you will see an entry in the object list for each of the three newly added data variables. Now we want to change the value of one of them.
Double-click on the entry of "testString" to open a detail tab for the variable.
Double-click on the "AttributeValue" column in the "Value" row to edit the value of the data variable. For our example let's type in "my test text" as the value for the testString data variable.
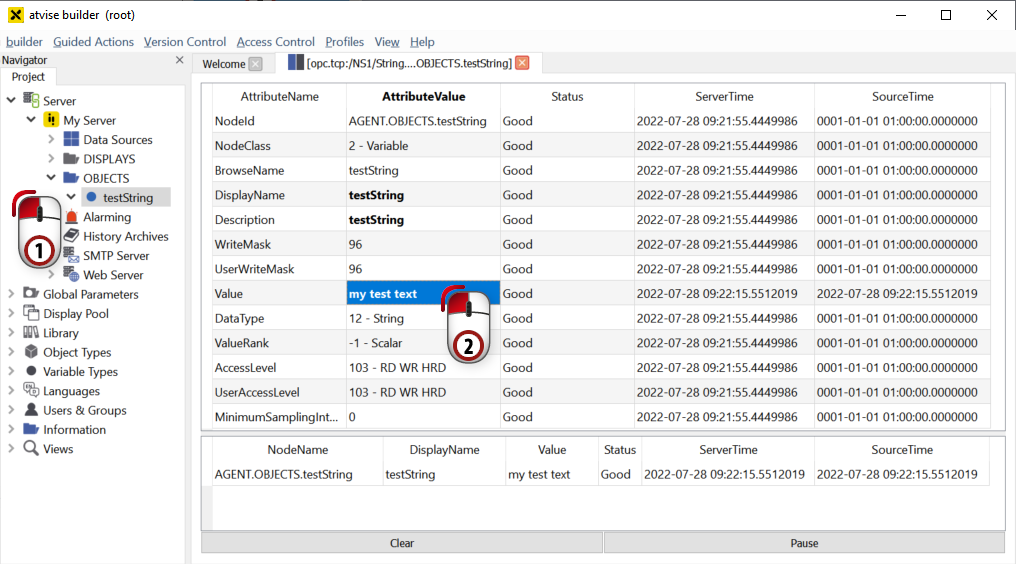
Changing the value of a data variable