Users and groups
atvise scada allows the creation of users who can be given certain rights within the HMI. This is done in the following way: Rights are set through groups, and the user is granted certain rights as a member of a certain group or groups.
Users
Shows all available users. The user "root" (= project administrator) must always exist. If it is deleted, it is automatically created on project start.
Warning
The default password of root and the first login procedure depend on the used project:
If it is a new project or a converted project, where OPC UA authentication was not required, log in with user root and no password. For security purposes, it is recommended to set a password for root after the first login.
If it is a converted project, where OPC UA authentication was required, logging in with root is not possible by default. In this case, an already existing user (created in the old project) must be used to log in. In order to prevent accidentally locking the project, the password for root shall be defined after the first login.
Adding a User
To add a new user, right-click on Users & Groups ‣ Users and select .
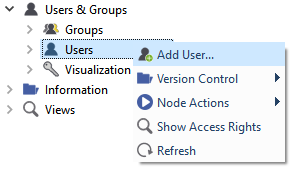
Adding a new user
Please note the following restrictions when creating new users:
Empty usernames are not possible.
Blanks, dots and backslashes are only allowed within the username, not at the beginning or end.
The following characters are not allowed:
Control codes (ASCII characters 0-31 as well as 127)
" / [ ] : ; | = , + * ? < >
Hint
Once created, renaming users is no longer possible.
Editing user information
To set up user information (full name, description, password, group membership) and access rights, double-click on a username. The user editor dialog will open. Changes to the user information must be saved with the ![]() button.
button.
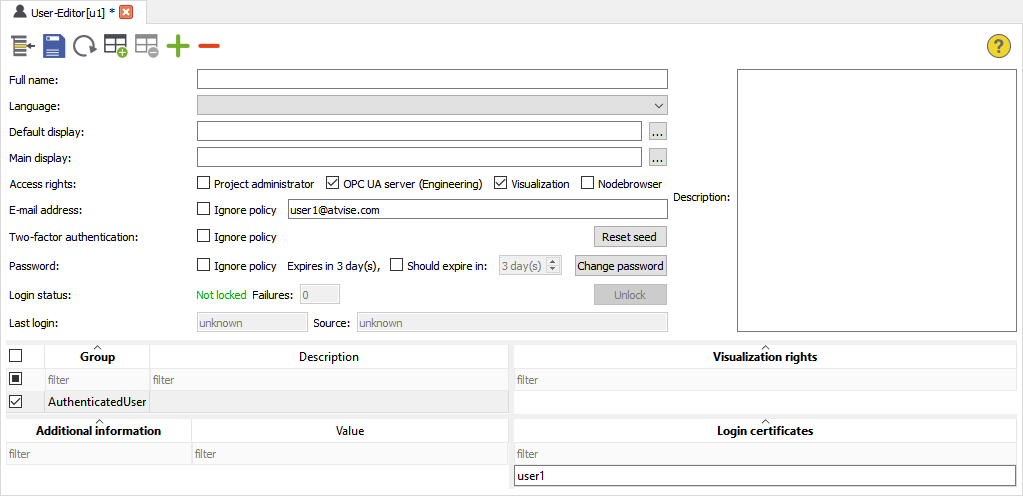
The user editor
Full name
Language
Default display – Replaces the default display for this user.
Main display – Replaces the main display for this user and is shown as start display after the login. After logging out, the displays are reloaded and the project's default and main display are shown.
Access rights – Allows to define user-specific access control settings:
Project administrator – The user gets project administrator rights, i.e. full access to the project. It is not necessary to explicitly define any other rights via access control editor.
OPC UA server (Engineering) – Defines if the user is allowed to log in via OPC UA (e.g. to the atvise builder).
Visualization – Defines if the user is allowed to log in to the visualization.
Node browser – Defines if the user is allowed to open the node browser tab.
Hint
If both, OPC UA server (Engineering) and Visualization, are disabled, the user is locked out.
E-mail address – The e-mail address that receives the one-time password for two-factor authentication. If a whitelist of allowed e-mail domains is defined and visible for users, only the local-part of the e-mail address can be entered in the text field. The domain must be selected via a combobox.
Ignore policy – Allows to ignore the e-mail policy for this user.
Two-factor authentication
Ignore policy – Allows to ignore two-factor authentication for this user.
Reset seed – Resets the seed that is used for generating one-time passwords. In this case the user must scan a new QR code after logging in to use app authentication.
Password
Ignore policy – Allows to ignore the password policy for this user.
Expires in – Shows the remaining days before the password expires.
Should expire in – A project administrator can extend or shorten the lifetime of the user's password. 0 means that the password expires immediately. This option is only displayed, if the password policy is enabled and a maximum password age is defined.
Change password – Allows to define or change the password for the user. The dialog also shows the specified rules of the password policy. A project administrator can change the password of a user without entering the old one. The password is immediately changed after confirming the dialog with the OK button.

Login status – The current login status of the user:
Shows if a user is locked or not locked. A project administrator can use the Unlock button to unlock a user.
Failures – The number of failed attempts.
Last login – Shows the time of the last login.
Source – The IP address of the device the user is logged in to.
Description – Allows to define an additional description text for the user.
Group – Allows to assign the user to one or more group(s). It is possible to filter the groups via the "Group" or "Description" column (the filters can also be combined). The filter checkbox allows to define which groups shall be displayed (selected
 , non-selected
  , all
, all  )
)Visualization rights – Shows the user's webMI rights. The rights are determined by the corresponding groups and cannot be changed here.
Additional information – Allows to set any additional information (e.g. phone number, etc.) for the user. Click
 to add, or
  to delete a specific entry. The name of an additional information entry must start with a capital letter.
Hint
Regular expression patterns can be used to filter groups, visualization rights or additional information. Refer to the Global Search chapter for more information on regular expressions.
Groups
Shows all available groups. In a new project, there are only the groups "Anonymous" and "AuthenticatedUser" by default. It is not possible to delete these groups or manually assign users to them. Anonymous users are automatically assigned to the "Anonymous" group, authenticated (logged in) users to the "AuthenticatedUser" group.
Adding a group
To add a new group, right-click on Users & Groups ‣ Groups and select .

Adding a new group
Please note the following restrictions when creating new groups:
Empty group names are not possible.
Blanks and dots are only allowed within the group name, not at the beginning or end.
The following characters are not allowed:
Control codes (ASCII characters 0-31 as well as 127)
" \ / [ ] : ; | = , + * ? < >
Hint
Once created, renaming groups is no longer possible.
Adding a new user to a group
To add a new user to a group, right-click on a group and then click on .

Adding a new user to a group
Editing group information
To set up rights and members for a specific group, double-click on a group name. The group editor dialog will open.
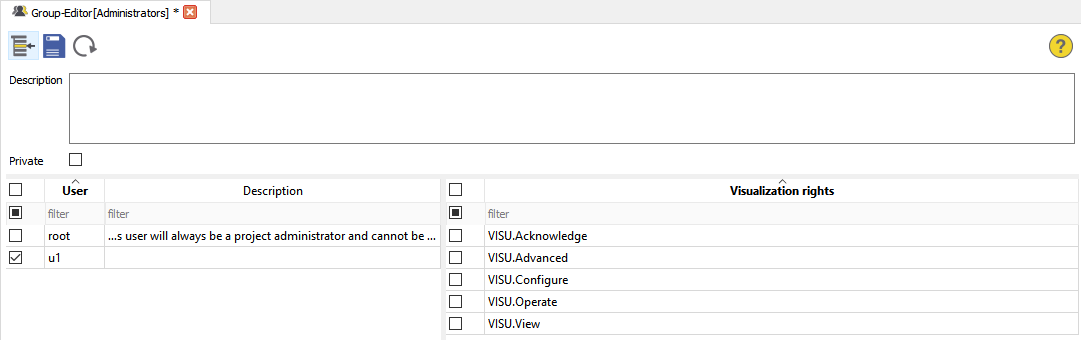
The group editor
Private – Defines if the group shall be private. Private groups are only visible for group members. Rights for a node that are assigned to a private group are always inherited by subnodes (see Inheritance).
User – Allows to select users as group members. The respective filter checkbox allows to define which user or right shall be displayed (selected
, non-selected , all )Right – Defines the visualization rights for the group and its users.
Hint
Visualization rights are only used by webMI.hasRight() and have no effect on access control. The "ENGINEERING.Login" right is not necessary anymore, since the OPC UA server (Engineering) option in the user settings (see above) defines whether a user can log in via OPC UA or not.
Regular expression patterns can be used to filter users and rights. Refer to the Global Search chapter for more information on regular expressions.
Adding user-defined rights
To add custom rights, right-click on Users & Groups ‣ Rights ‣ Userdefined rights and select .

Adding a new right